Create a Collection
Preparatory Steps for Creators
Before creating your NFT collection, you'll need to prepare your assets and metadata. Here are the essential steps to get ready:
Metadata Preparation
Collection creators should prepare their data in advance to ensure a smooth creation process. Your collection metadata should include:
- Name: A unique and memorable name for your collection
- Description: Detailed information about your collection's theme, story, or concept
- Image: A representative image that will be displayed as your collection's banner
NFT Metadata Structure
Each NFT in your collection requires a metadata JSON file. This metadata is crucial because:
- Marketplaces only receive the metadata JSON file URI (not the actual NFT image)
- The marketplace parses the metadata to extract information including the image URL
- The
imagefield is essential - without it, marketplaces cannot display your NFT image
Required Metadata Fields
Your NFT metadata JSON must include these fields:
{
  "name": "NFT Name",
  "description": "NFT Description",
  "image": "https://ipfs.io/ipfs/your_image_CID",
  "attributes": [
    {
      "trait_type": "Background",
      "value": "Blue"
    }
  ]
}
Critical Note: The image field must contain the direct URL to your NFT image file. This is how marketplaces know where to fetch and display your NFT image. Without this field, users will see broken images or no images at all.
NFT Creation Tools
To create the NFT images and metadata for your collection, you can use these popular platforms:
No-Code Platforms (Paid)
- NFT Generator Art - User-friendly interface for creating NFT collections
- Bueno.art - Professional NFT creation platform with advanced features
- Genfty - Comprehensive NFT generation suite
Note: These platforms are no-code solutions but require payment and offer limited customization options.
Code-Based Platform (Free)
- HashLips Art Engine - Open-source, customizable NFT generation tool
Note: HashLips is code-based, completely free, and offers extensive customization similar to Qbros generation. It's ideal for creators who want full control over their NFT generation process.
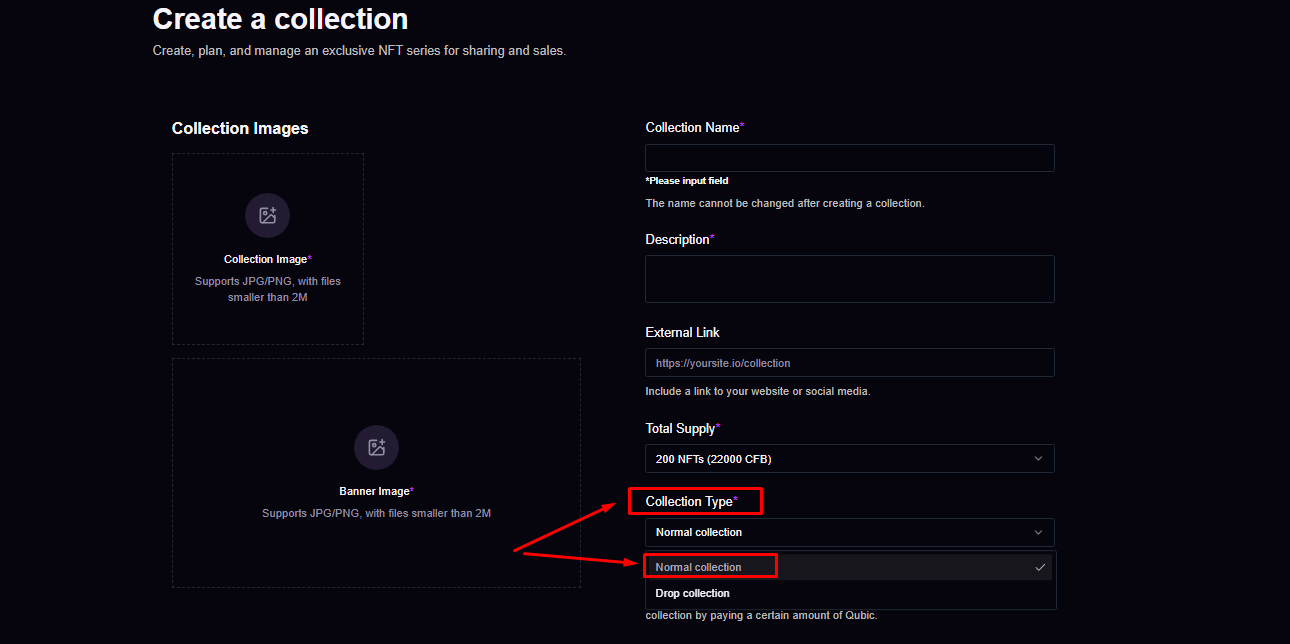
- Drop Collection
- Normal Collection
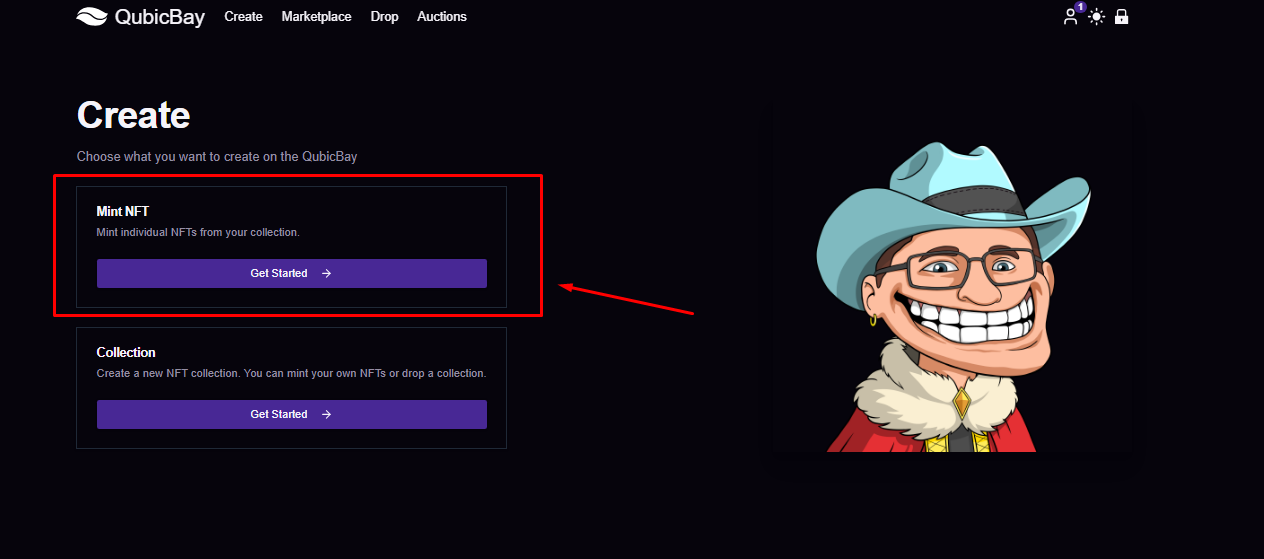
Step 1: Access Create Interface
To create an NFT collection, click the Create button.

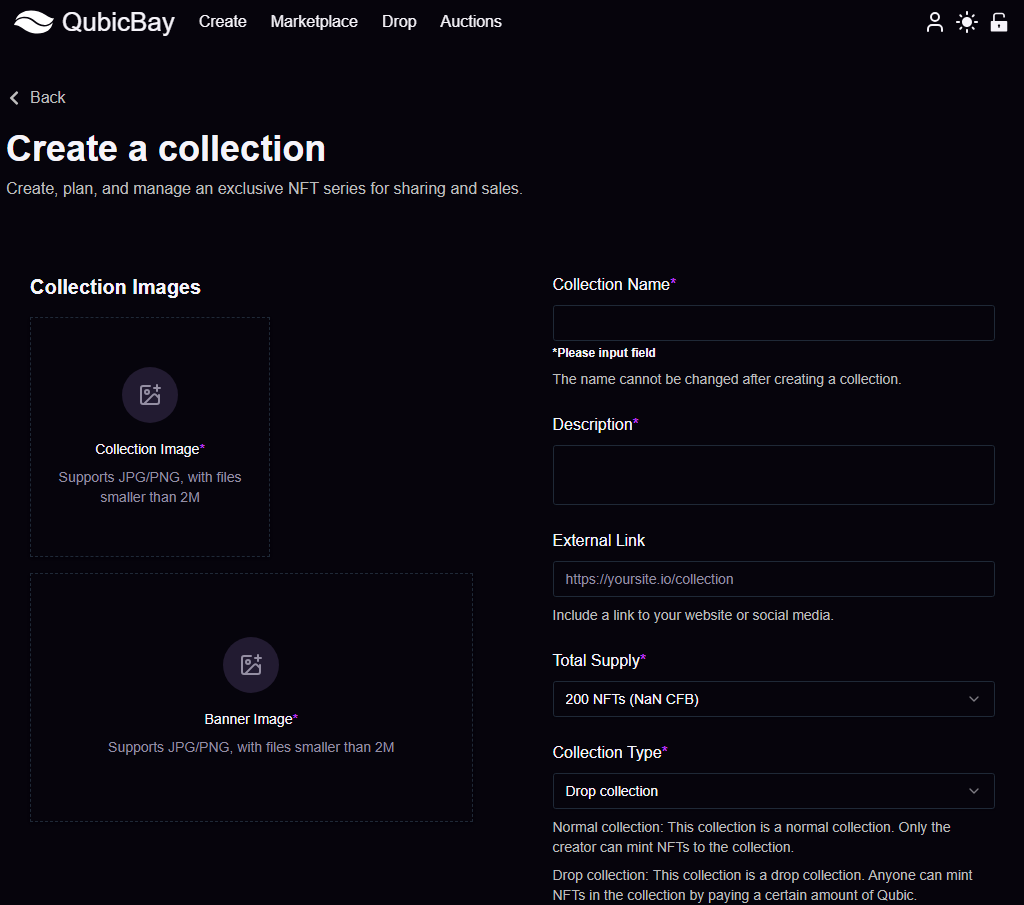
Step 2: Fill Collection Information
Access the collection creation interface and follow the prompts to fill in the relevant information, then click the Confirm button.
This will successfully create your collection, allowing for easier management and showcasing of your NFTs.
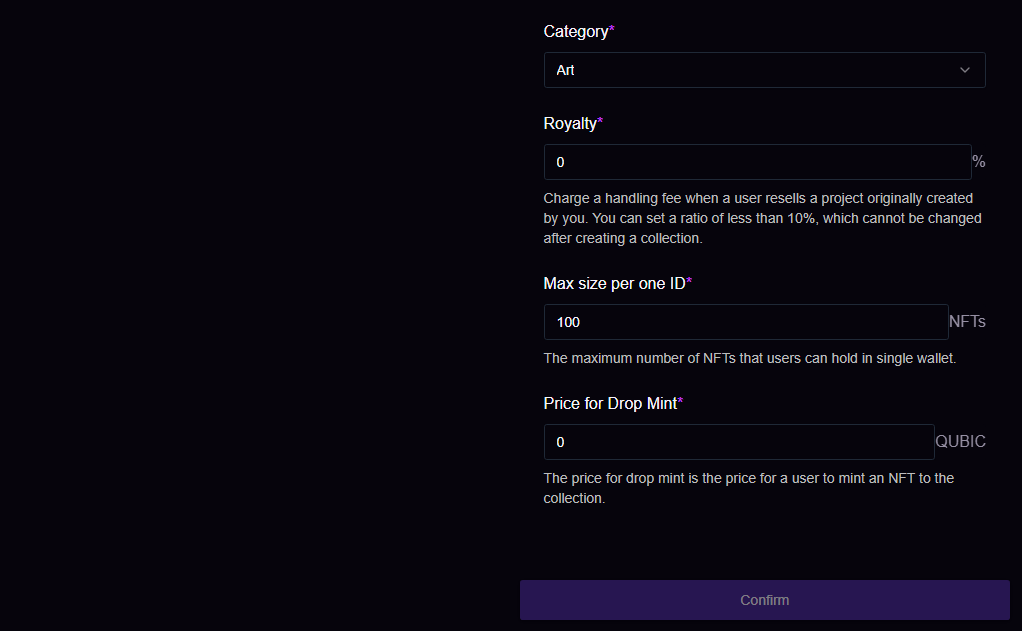
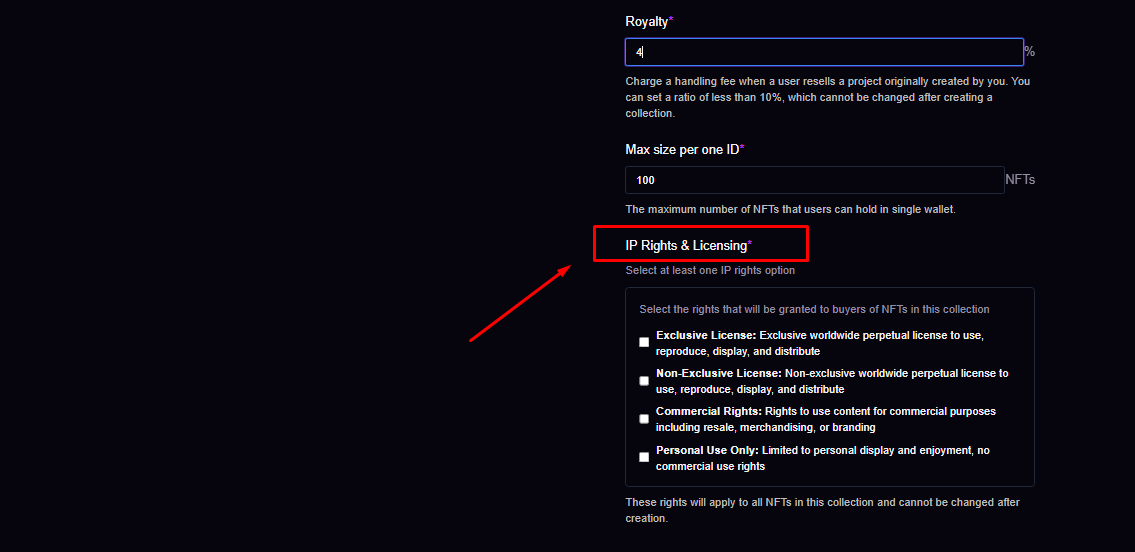
You must select at least one IP Rights & Licensing option.
Step 3: Complete and Verify
Fill in each field correctly, then click the Confirm button and check your personal account.
Step 4: Upload Assets
Click on the collection you created and upload your assets.
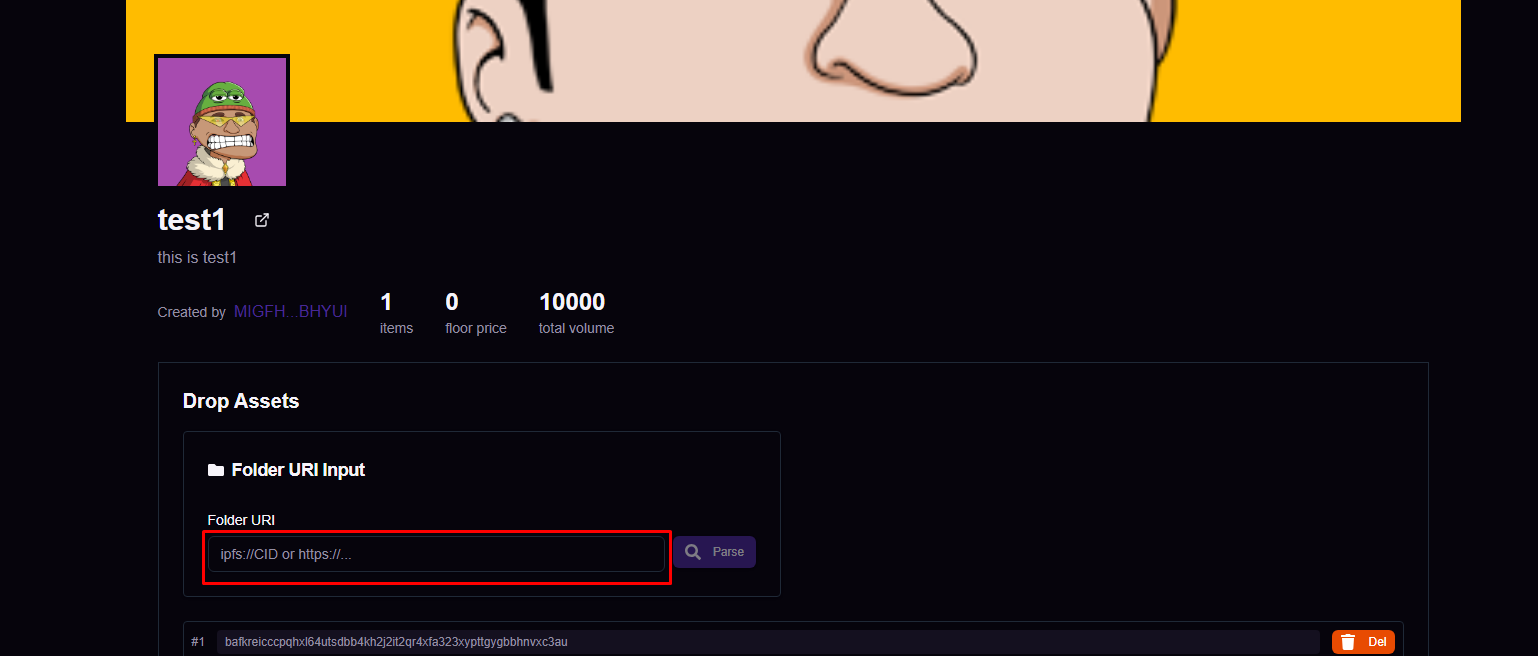 For Folder URI, copy and paste the link from the image below.
Use the format: https://ipfs.io/ipfs/your_folder_CID
Example: https://ipfs.io/ipfs/bafybeidosowt325fsnmvizmfmrtgd4mldygvpoi5ntjotksosj6pu4hs2e
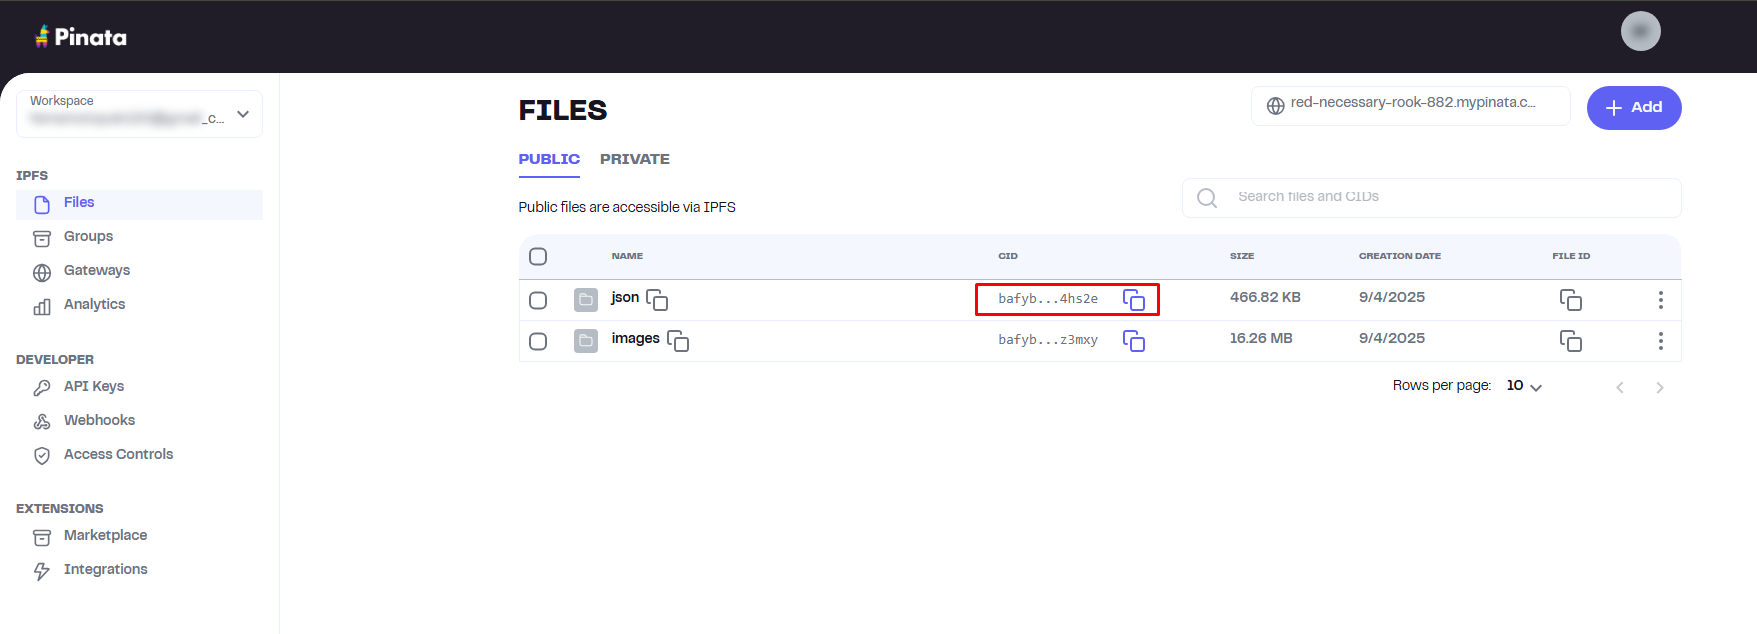
Important: Ensure your IPFS folder contains:
- Individual NFT image files
- Metadata JSON files (one for each NFT) with the
imagefield pointing to the correct image URL
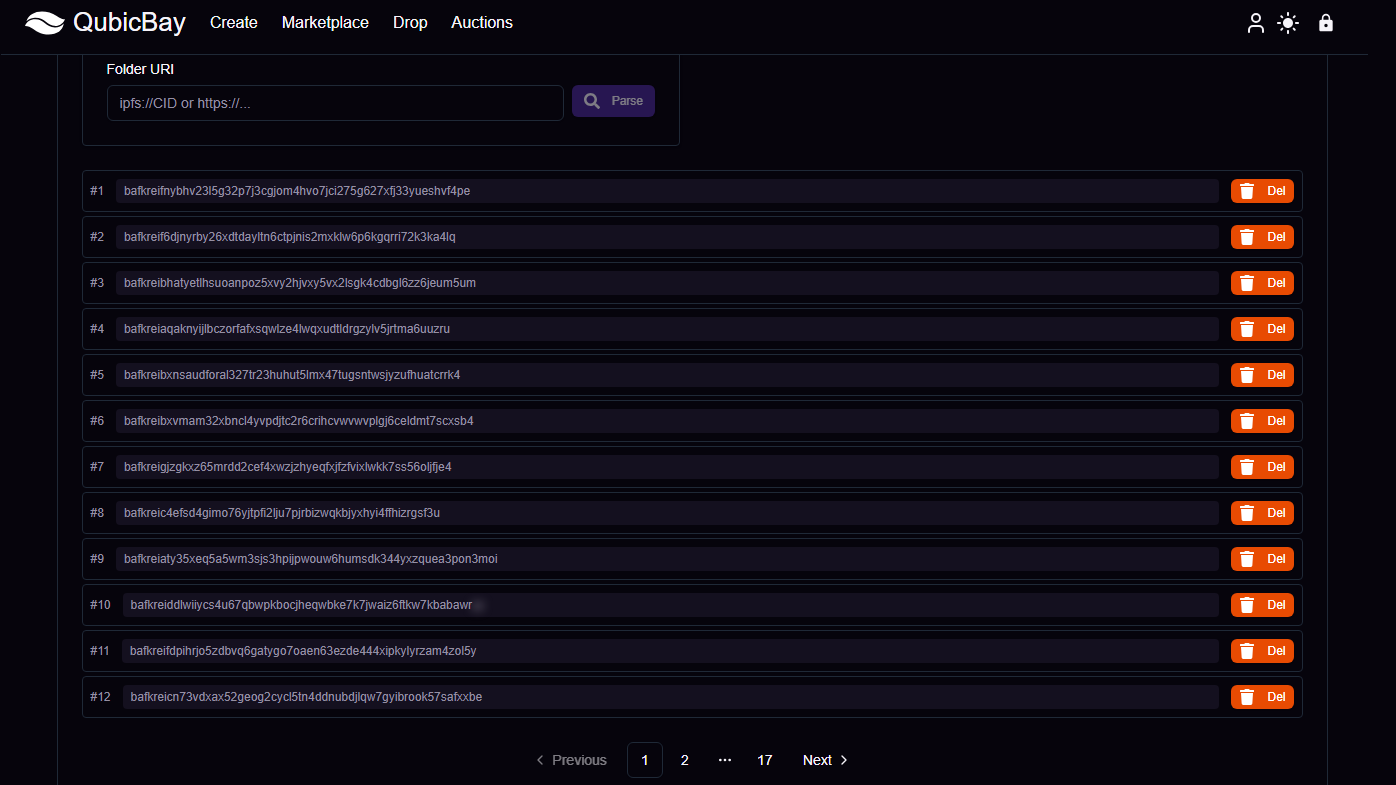
You can check the metadata by pasting the link and clicking the Parse button.
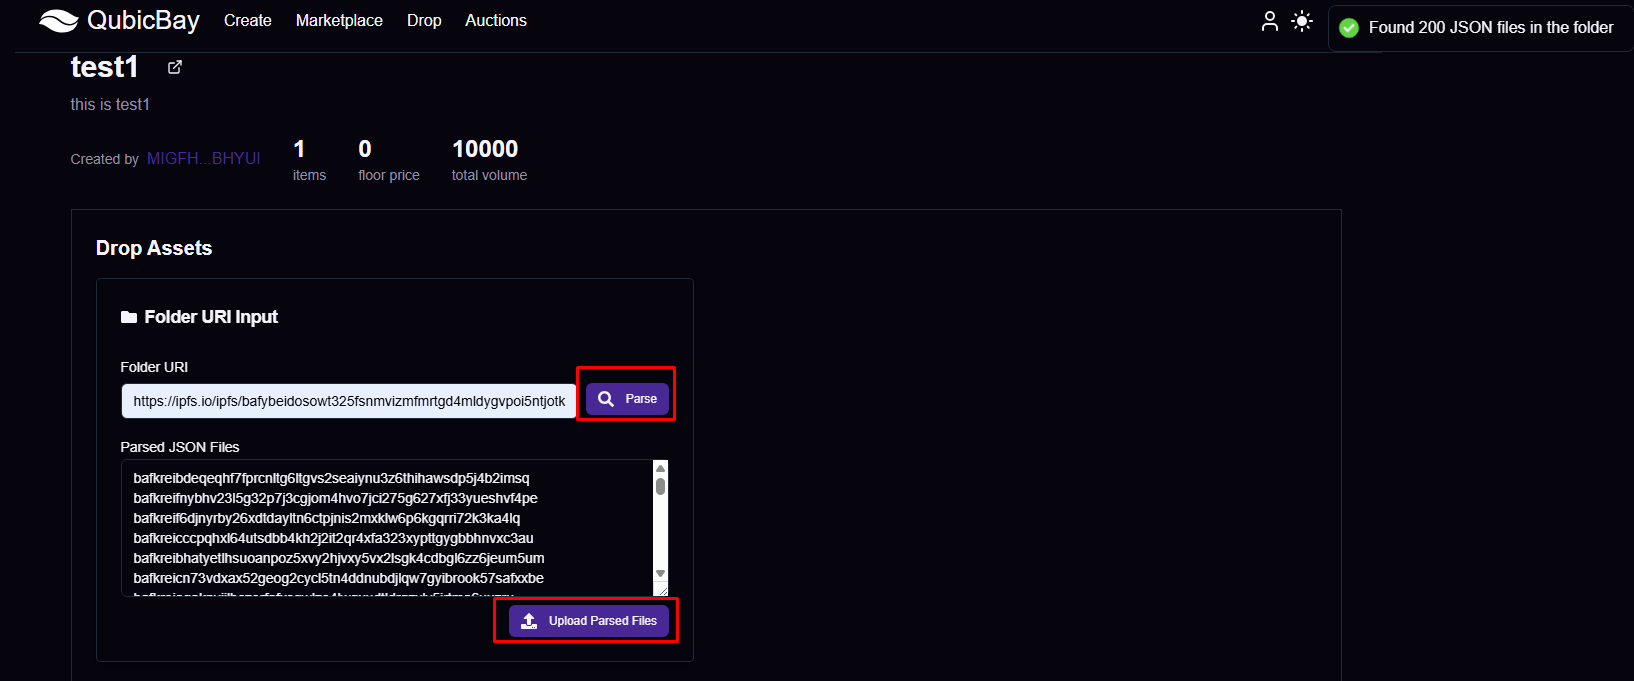
Once successfully uploaded, you will see the following image
Step 5: Collection Complete
Your collection is now ready! You can start adding NFTs and managing your collection.
Step 1: Select Create Option
Choose the normal collection option.
You must select at least one IP Rights & Licensing option.
Step 2: Mint NFTs
Start minting NFTs for your collection.
Select the collection you wish to mint to.
⚠️ WARNING: For normal collections, the creator must add the attributes/traits manually. Unlike drop collections where attributes are automatically generated from metadata, normal collections require you to manually configure each NFT's traits and attributes.
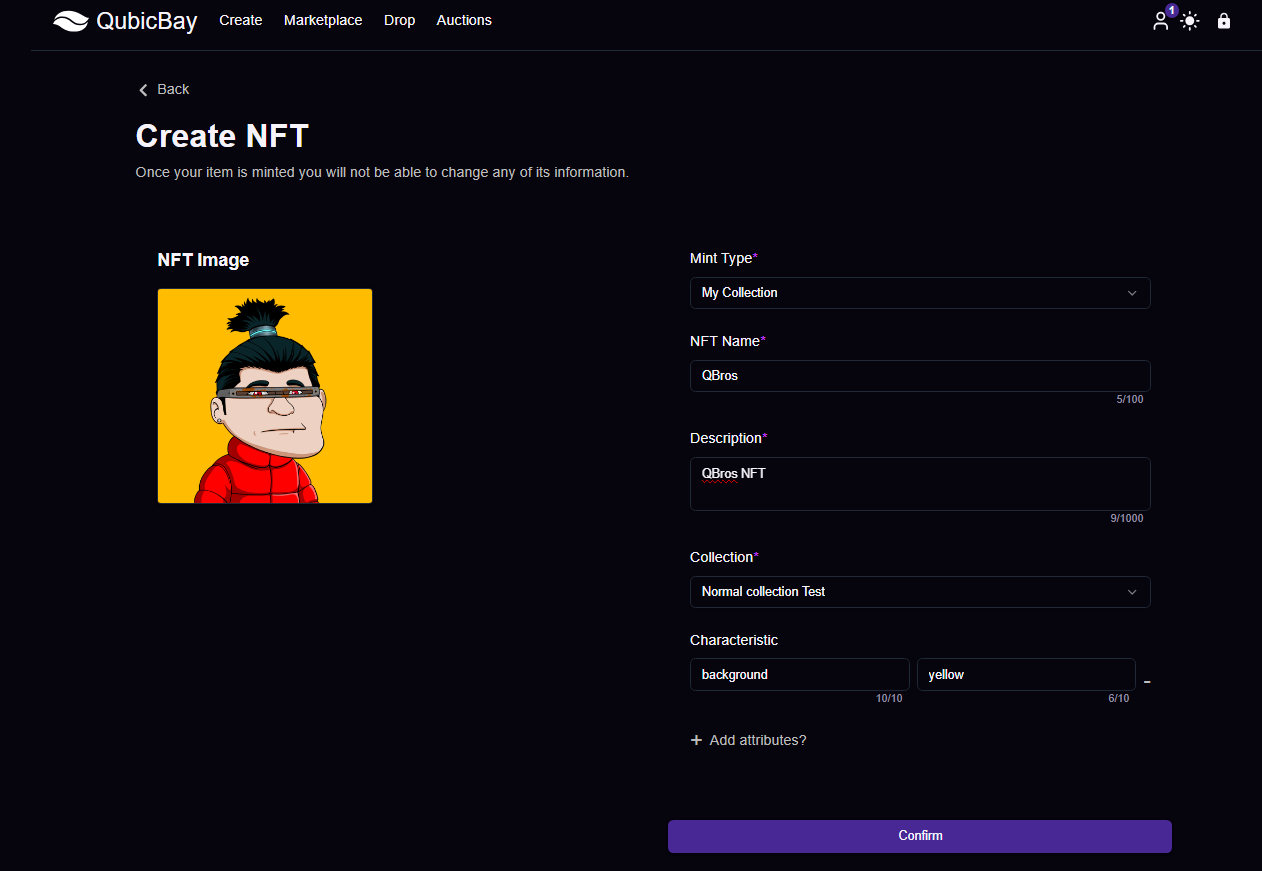
You have successfully minted your NFT!
Step 3: Collection Management
Your normal collection is now ready for management and trading.
Note: Normal collections are suitable for standard NFT projects that don't require special drop functionality.